 Save
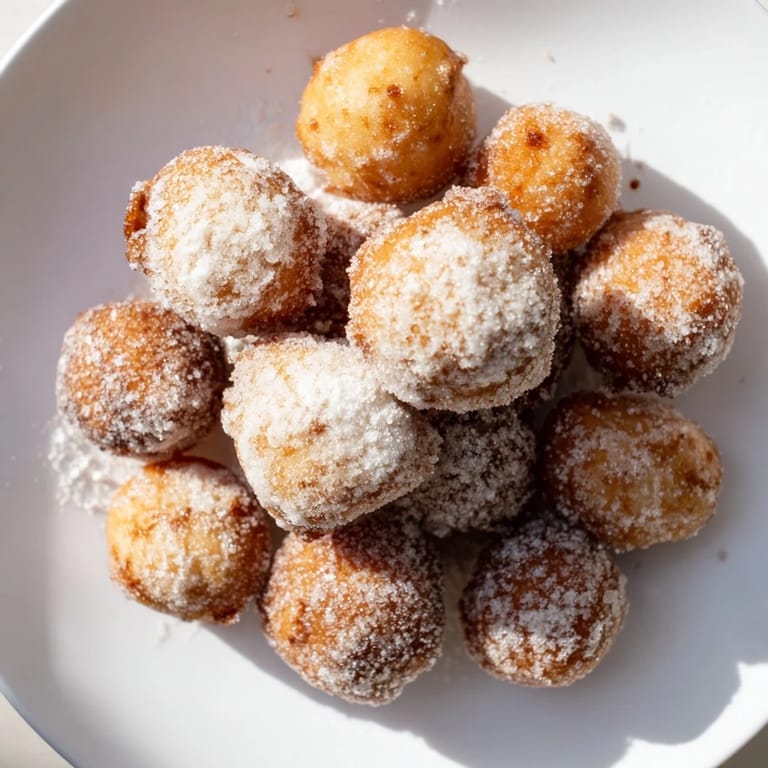
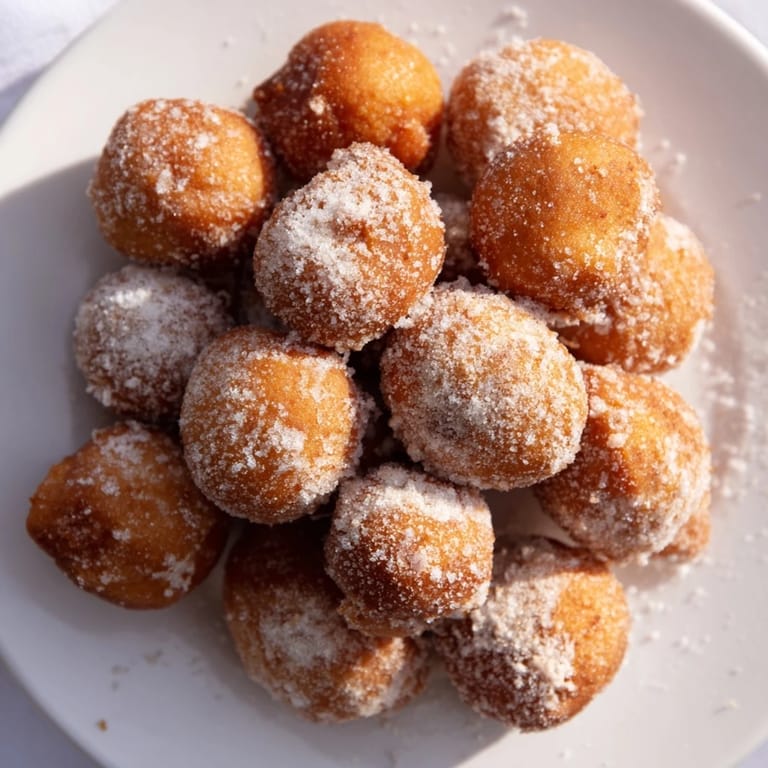
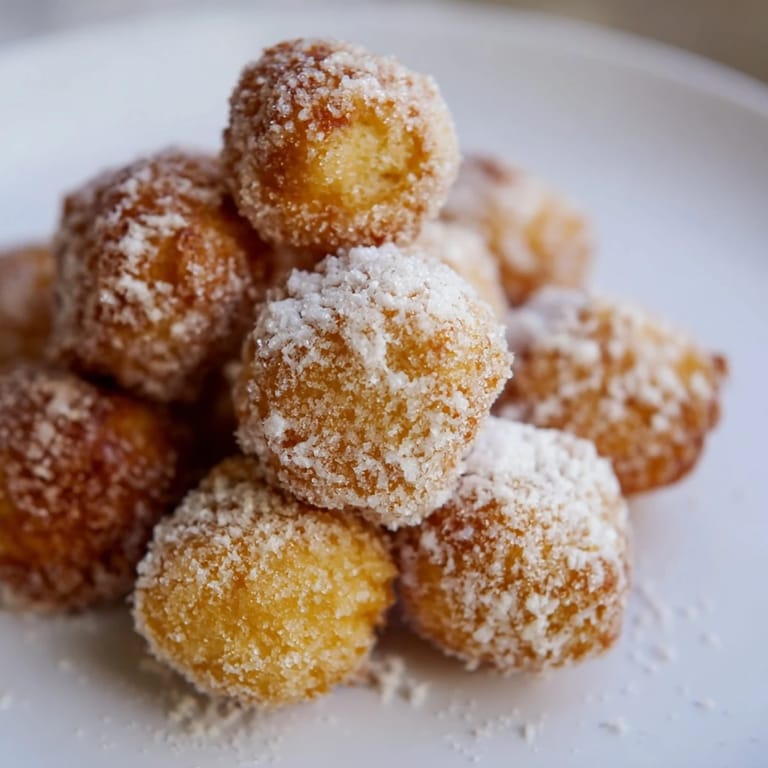
Save My mom used to make doughnut holes on lazy Sunday mornings, and I'd watch them puff up in the oil like tiny golden clouds. There's something magical about how a simple ball of dough transforms in hot oil—it takes maybe three minutes and suddenly you have this crispy, tender treasure that tastes nothing like the flat dough it started as. The first time I made them myself, I burned half a batch because I wasn't paying attention, but the ones that turned out golden brown disappeared so fast I barely got to taste one. Now every time I make them, I'm transported back to that kitchen, the smell of nutmeg and vanilla filling the air, and the pure joy of biting into something warm and sweet right out of the pan.
I brought these to a potluck once, convinced no one would eat them because everyone was so focused on the elaborate main dishes. By the time I turned around, the plate was nearly empty and three people were asking for the recipe. That's when I realized doughnut holes aren't a casual afterthought—they're the kind of thing people actually remember about a gathering, the little indulgence that made them smile.
Ingredients
- All-purpose flour (2 cups): This is your foundation, and measuring it by weight instead of scooping gives you the most consistent results every single time.
- Granulated sugar (1/4 cup): Just enough sweetness in the dough itself so the coating doesn't have to do all the work.
- Baking powder (1 1/2 tsp): The secret ingredient that makes these tender inside instead of dense and heavy.
- Salt (1/2 tsp): A small amount that makes everything taste more like itself.
- Ground nutmeg (1/2 tsp): This is non-negotiable—it's what separates homemade doughnut holes from the forgettable kind.
- Whole milk (2/3 cup): Brings richness and helps the dough come together without being too thick or too thin.
- Large eggs (2): Bind everything and add structure so the holes hold their shape in the hot oil.
- Unsalted butter (2 tbsp, melted): Adds tender crumb and a subtle richness that you'll taste in every bite.
- Vanilla extract (1 tsp): Brings warmth and depth that rounds out the nutmeg.
- Vegetable oil (4 cups): Use neutral oil with a high smoke point; peanut or canola work beautifully.
- Powdered or cinnamon-sugar coating: The final flourish that makes them irresistible while still warm.
Tired of Takeout? 🥡
Get 10 meals you can make faster than delivery arrives. Seriously.
One email. No spam. Unsubscribe anytime.
Instructions
- Mix the dry team:
- In a large bowl, whisk together the flour, granulated sugar, baking powder, salt, and nutmeg until everything is evenly distributed. You're looking for a consistent, sandy texture with no clumps of baking powder hiding anywhere.
- Combine the wet ingredients:
- In a separate bowl, whisk the milk, eggs, melted butter, and vanilla extract until they're fully combined and the mixture looks homogeneous. This step ensures your doughnut holes will be tender rather than rubbery.
- Bring them together:
- Pour the wet mixture into the dry ingredients and stir gently with a spoon or whisk until just combined. The dough should look shaggy and slightly lumpy—this is exactly what you want. Overmixing creates tough doughnut holes, so stop as soon as you don't see dry flour anymore.
- Heat your oil:
- Pour the vegetable oil into a deep pot or Dutch oven and heat it to 350°F, using a thermometer to be sure. The temperature matters more than you'd think; too cool and they'll be greasy, too hot and they'll burn on the outside while staying raw inside.
- Portion and fry:
- Using a small cookie scoop or spoon, drop tablespoon-sized balls of dough into the hot oil, working in batches so you don't crowd the pan. Each doughnut hole needs room to float and turn freely.
- Watch them transform:
- Let them fry for 2 to 3 minutes, turning occasionally with a slotted spoon, until they're golden brown all over and cooked through. You'll see them puff slightly as they cook, which is the magic moment happening in real-time.
- Drain and rest:
- Remove each batch with a slotted spoon and place them on paper towels to drain. They'll continue to firm up slightly as they cool.
- Coat while warm:
- While the doughnut holes are still warm, roll them in your choice of powdered sugar, or a mixture of granulated sugar and cinnamon. The warmth helps the coating stick and meld into the outside slightly.
- Eat them immediately:
- Serve right away while they're still warm and the coating hasn't had time to dissolve into the dough. This is when they're at their absolute best.
 Save
Save There's something deeply satisfying about the moment when you pull a golden doughnut hole out of the oil and it's perfect—crispy, warm, and tender all at once. That simple achievement, multiplied by 24, somehow feels more impressive than it should, and it reminds me that some of the best kitchen moments come from the simplest recipes.
The Science of the Perfect Doughnut Hole
The baking powder is what keeps these from being dense little hockey pucks—it creates tiny air pockets that make them tender and almost cake-like inside despite being fried. The nutmeg isn't just decoration either; it's a classic pairing with fried dough that somehow makes everything taste warmer and more nostalgic. When the dough hits the hot oil, the outside sets quickly while the inside stays tender, which is why timing and temperature are your best friends here.
Coating and Storage
The beauty of the powdered sugar coating is that it sticks to warm doughnut holes and creates this delicate sweetness that doesn't overpower the nutmeg and vanilla in the dough itself. If you want more spice, the cinnamon-sugar mixture gives you that classic doughnut shop flavor that people always recognize immediately. For storage, keep them in an airtight container for up to a day, though they really are best eaten fresh and warm—leftover doughnut holes can be revived by warming them gently in the oven for a few minutes.
Fun Variations and Make-Ahead Tips
Once you master the basic recipe, you can experiment with additions like a pinch of cardamom for extra complexity, or a tiny hint of allspice if you want something more autumnal. Some people fill them after frying by using a small paring knife to cut a tiny pocket and stuffing them with jam or chocolate—it's a delightful surprise and honestly easier than you'd think. You can make the dough up to a few hours ahead and keep it covered in the fridge, though it's best to fry them fresh when you're ready to serve.
- Try adding a pinch of cardamom or allspice to the dry ingredients for a flavor variation.
- For filled doughnut holes, make a small slit after frying and pipe in jam, chocolate, or pastry cream.
- Don't store them in a sealed container while still warm or they'll become chewy instead of crispy.
 Save
Save These doughnut holes are the kind of recipe that becomes a comfort thing, something you make when you want to feel a little joy in your kitchen. They're proof that simple ingredients and a little attention to detail can create something that tastes like it came from somewhere special.
Recipe FAQs
- → What ingredients ensure a tender inside?
Using whole milk, eggs, and melted butter helps create a moist and tender interior in the dough balls.
- → How do I achieve a crisp outside texture?
Frying the dough balls at a steady temperature of 350°F (175°C) ensures a golden, crispy exterior.
- → Can I add different flavors to the dough?
Yes, incorporating spices like nutmeg or cardamom adds warmth and depth to the flavor.
- → What are the coating options for these dough balls?
They can be rolled in powdered sugar or a mixture of granulated sugar and ground cinnamon for a classic sweet finish.
- → Is it possible to fill the dough balls after frying?
Absolutely, once fried, you can inject them with jam or chocolate for an extra special treat.