 Save
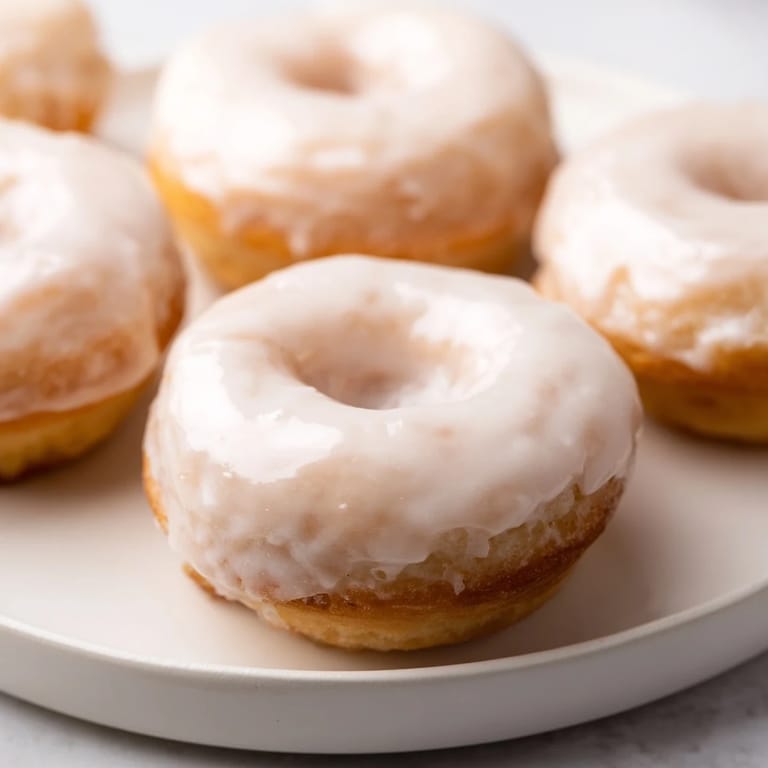
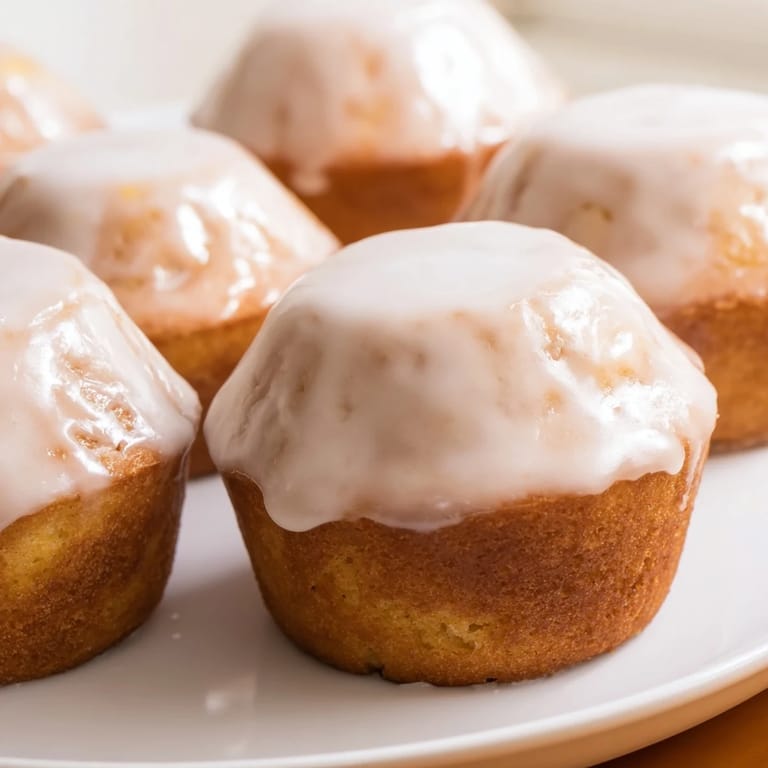
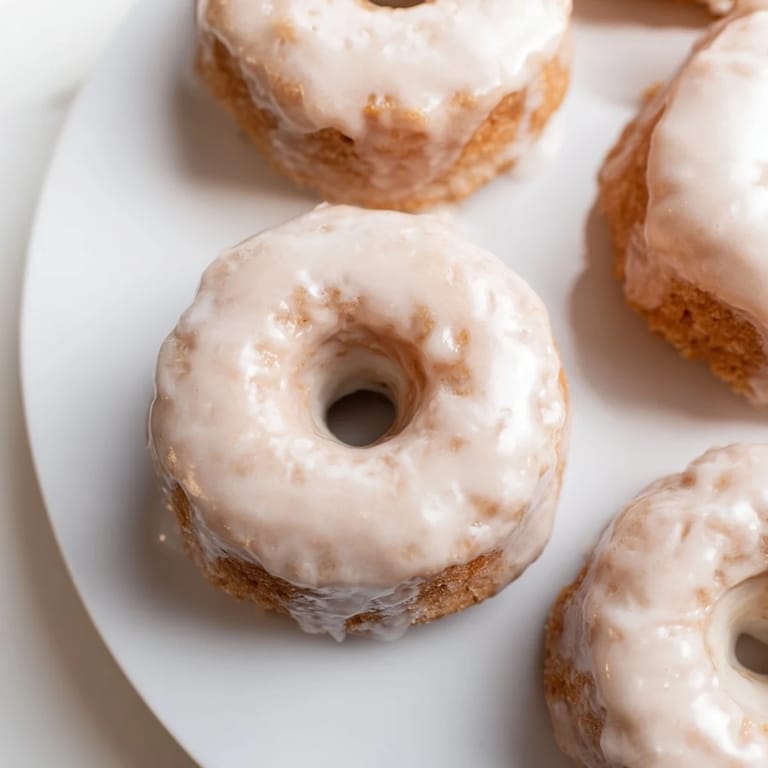
Save There's something magic about pulling a tray of warm donuts from the oven—the smell alone makes you forget you didn't have to stand over hot oil. A friend's kitchen mishap with a deep fryer led me to experiment with baking donuts in a muffin tin, and honestly, I've never looked back. The cake-like crumb, the way the glaze pools into every little crevice, the fact that my kitchen doesn't smell like a donut shop for three days afterward—it all just works. These aren't complicated, but they taste like someone who knows what they're doing made them.
I made these for a Sunday morning when my nephew was visiting, and he ate three before I even finished glazing the rest. His mom was mock-offended I hadn't told her about this recipe sooner, and we spent the next hour debating whether they were better warm with the glaze still sticky or cooled completely. That debate hasn't been settled, but the batch was gone either way.
Ingredients
- All-purpose flour (2 cups): This is your structure—don't skip sifting if you want them to rise light and fluffy instead of dense.
- Granulated sugar (2/3 cup): Sweetness without drama; it dissolves right into the batter and lets the other flavors shine.
- Baking powder and baking soda (2 tsp and 1/2 tsp): The dynamic duo that makes these puff up and get that tender crumb, so measure them straight.
- Salt (1/2 tsp): Just enough to make you wonder what the secret ingredient is when someone tastes them.
- Ground nutmeg (1/2 tsp): This is the move that separates them from boring muffins—it's warm, almost savory, and makes people ask what it is.
- Whole milk (2/3 cup): Room temperature matters more than you'd think; cold milk can make the batter lumpy.
- Unsalted butter, melted and cooled (1/2 cup): Melted and cooled is the key—piping hot butter scrambles the eggs if you're not careful.
- Large eggs (2): Room temperature, same as the milk—this helps everything blend smoothly.
- Pure vanilla extract (2 tsp): Real vanilla, not the artificial stuff, because you taste the difference.
- Powdered sugar, sifted (1 1/2 cups): Sifted means no lumps in your glaze, which matters more than it sounds.
- Milk for glaze (2–3 tbsp): Start with 2 and add more if you want a thinner glaze, less if you like it thick and sculptural.
Tired of Takeout? 🥡
Get 10 meals you can make faster than delivery arrives. Seriously.
One email. No spam. Unsubscribe anytime.
Instructions
- Heat your oven and prep the tin:
- Preheat to 350°F and grease all 12 cups generously—even nonstick spray helps them pop out without sticking. I learned this the hard way when I forgot one corner and had to fish out donut pieces.
- Mix your dry team:
- Whisk the flour, sugar, baking powder, baking soda, salt, and nutmeg in a large bowl until they're evenly distributed. This is where the nutmeg gets to make friends with everything else.
- Combine your wet ingredients:
- In another bowl, whisk milk, cooled melted butter, eggs, and vanilla until it's smooth and looks fully incorporated. The cooled butter is crucial so you don't accidentally cook the eggs.
- Bring them together gently:
- Pour the wet mixture into the dry mixture and stir just until combined—lumps are your friends here, overmixing makes tough donuts. Count to ten and stop, even if it looks a little shaggy.
- Fill the tin:
- Divide the batter evenly among the cups, filling each about halfway; they'll puff up a bit, and you want room for that. A small ice cream scoop makes this stupidly easy and even.
- Bake until golden:
- Bake 14–16 minutes until the tops are lightly browned and a toothpick comes out clean. The smell will start calling you to the oven around minute 12.
- Cool properly:
- Let them sit in the tin for 5 minutes so they set, then slide them onto a wire rack to cool completely. This step matters—they need to set up before glazing or they'll fall apart.
- Make the glaze:
- Whisk powdered sugar, milk, and vanilla in a small bowl until smooth, adjusting milk to get the thickness you want. It should be pourable but hold together when it clings to the donut.
- The final dip:
- Once the donuts are completely cool, dip the top of each into the glaze and let the excess drip off before placing it back on the rack. A slow rotation helps the glaze coat evenly.
 Save
Save The first time I made these, I realized halfway through that I'd skipped the nutmeg by accident. My dad took a bite and said they were good but something was missing—he couldn't put his finger on it. When I made them again and included it, he took a bite and nodded slowly like I'd solved a mystery he didn't know he had. It's wild how one ingredient can shift the whole personality of something so simple.
Why Baking Instead of Frying
I grew up watching my grandmother fry everything, and I respect the craft, but baked donuts let you skip the stress and mess. Your kitchen stays pleasant, your clothes don't smell like oil, and you can make them on a Tuesday morning without turning it into a whole production. They're lighter than fried donuts, less guilt-inducing to eat a second one, and somehow still taste indulgent.
Variations and Flavor Swaps
Once you nail the basic recipe, you can play with the finish without changing the batter at all. A cinnamon-sugar coating is classic if you brush them with melted butter while they're still warm, and sprinkles turn them into something that feels more like a celebration. I've also crushed pistachios into the glaze for an unexpected crunch, or added a pinch of cardamom to the batter when I'm feeling fancy. The beauty of having a solid base is that you can dress it up however the mood strikes.
Storage and Keeping Them Fresh
These taste best the day you make them, when the glaze is still glossy and the cake is at its softest. After that, they'll keep in an airtight container for a couple of days, though they do get a bit firmer—still good for dunking in coffee or eating out of boredom at midnight. If you want to freeze them, wrap them individually before they go in the freezer and they'll last up to three weeks, though I've never managed to keep them around that long.
- Store in an airtight container at room temperature to keep them from drying out faster than expected.
- If you're making them ahead for an event, bake and cool them the day before, then glaze them a few hours before serving.
- Cold donuts are still good, but a quick 10 seconds in the microwave brings back some of that just-baked softness.
 Save
Save There's a reason donuts taste like comfort, and now you can make that feeling happen in your own kitchen in under an hour. Once you realize how simple this is, you'll wonder why you ever bought them from a box.
Recipe FAQs
- → Can I use a non-dairy milk alternative?
Yes, plant-based milk like almond or oat milk can substitute whole milk without affecting the texture significantly.
- → How do I prevent the donuts from sticking to the muffin tin?
Grease the muffin tin thoroughly with butter or nonstick spray before filling with batter to ensure easy removal.
- → What is the best way to achieve a smooth glaze?
Whisk powdered sugar with milk and vanilla extract until smooth; adjust milk to reach your desired consistency.
- → Can these be made gluten-free?
Substitute all-purpose flour with a gluten-free blend, but results may vary slightly in texture.
- → How long do the glazed donuts stay fresh?
Store them in an airtight container at room temperature; best consumed within 2 days for optimal freshness.