 Save
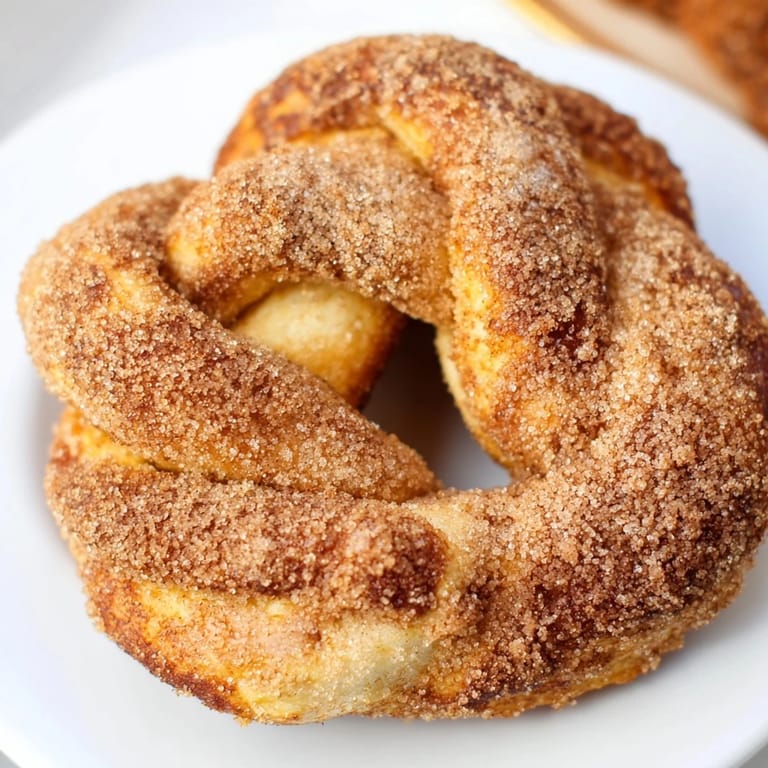
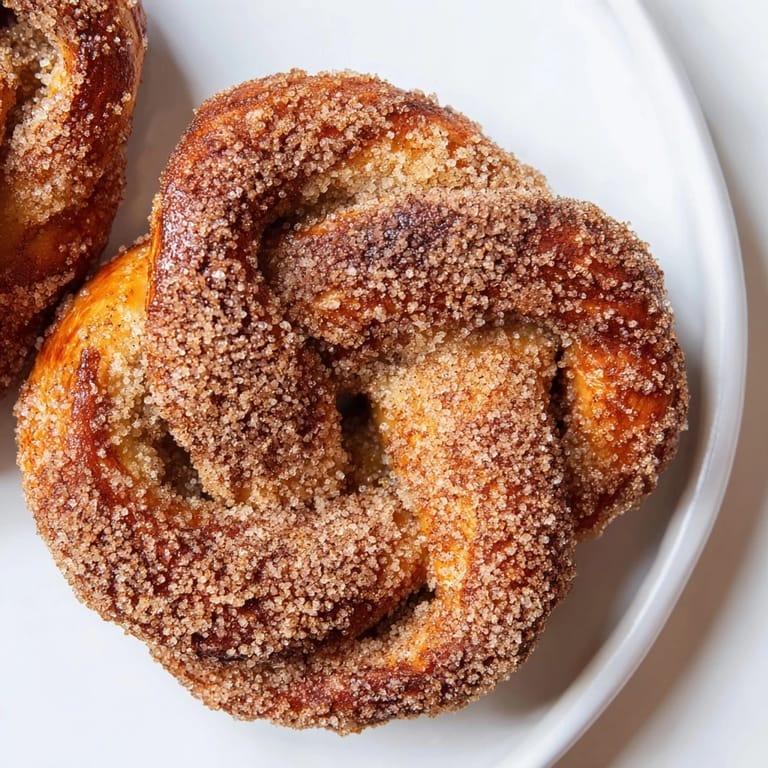
Save My sister called one Sunday afternoon asking if I could bring something sweet to a family game night, and I found myself standing in the kitchen with a bag of flour and an idea that felt somehow both risky and inevitable. Cinnamon sugar pretzels felt like the answer—the kind of thing that nobody expects but everyone remembers. That first batch turned the whole house into a bakery, and watching my nephew's face light up when he bit into one warm from the oven made me understand why some recipes become the ones you make again and again.
I made these for a bake sale at work once, and they sold out before noon—which was somehow both flattering and a little crushing since I'd only made a single batch for myself. Now I always double the recipe, partly because people ask, but mostly because that smell of cinnamon and warm butter filling the kitchen is worth the extra effort.
Ingredients
- Warm water: The temperature matters here—too hot kills the yeast, too cool and nothing happens, so a kitchen thermometer is your best friend if you don't trust your instincts yet.
- Active dry yeast: This is what transforms flour and water into something that actually rises, and it's worth using fresh yeast from a sealed packet.
- All-purpose flour: The backbone of these pretzels, and it needs just enough gluten to create that perfect chewy texture.
- Salt: A small amount that somehow makes the sweetness taste sweeter.
- Unsalted butter: For both the dough and the final coating, because salted butter will make things too salty once you add the cinnamon sugar.
- Baking soda: The ingredient that actually makes these pretzels, not just bread twisted into a shape—it gives them that distinctive chewy interior.
- Cinnamon and sugar: The coat that makes them irresistible, so don't skimp on either.
Tired of Takeout? 🥡
Get 10 meals you can make faster than delivery arrives. Seriously.
One email. No spam. Unsubscribe anytime.
Instructions
- Wake up the yeast:
- In a large bowl, combine warm water, yeast, and sugar, then let it sit for 5 minutes until foamy on top. You'll know it's working when it smells yeasty and alive, which sounds dramatic but it's true.
- Build your dough:
- Add flour, salt, and melted butter to the yeast mixture and mix until everything comes together into a shaggy dough. It'll look rough right now, but that's exactly what you want.
- Knead into silk:
- On a lightly floured surface, knead for 5 to 7 minutes until the dough becomes smooth and elastic—your hands will feel the difference. Press it, fold it, turn it, and you'll understand what kneading actually does.
- Let it rise:
- Place the dough in an oiled bowl, cover it with a kitchen towel, and let it rise for an hour or until it's roughly doubled in size. This is the perfect time to tidy up or just sit with your coffee and think about what's coming.
- Prepare your station:
- Preheat your oven to 450°F and line two baking sheets with parchment paper. Bring 10 cups of water and 2/3 cup baking soda to a boil in a large pot—this bath is what makes pretzels actually taste like pretzels.
- Shape into pretzels:
- Divide the risen dough into 8 pieces and roll each one into a 20-inch rope, then twist it into that classic pretzel shape. Your fingers will learn the motion quickly, and by the second one you'll feel like you know what you're doing.
- The water bath moment:
- Carefully dip each pretzel into the boiling water for just 30 seconds—use a slotted spatula and work quickly. This step is where the magic happens, where bread becomes something altogether different.
- Bake until golden:
- Place the pretzels on your prepared sheets and bake for 12 to 15 minutes until they're deep golden brown. The kitchen will smell incredible, and you'll understand why people bake.
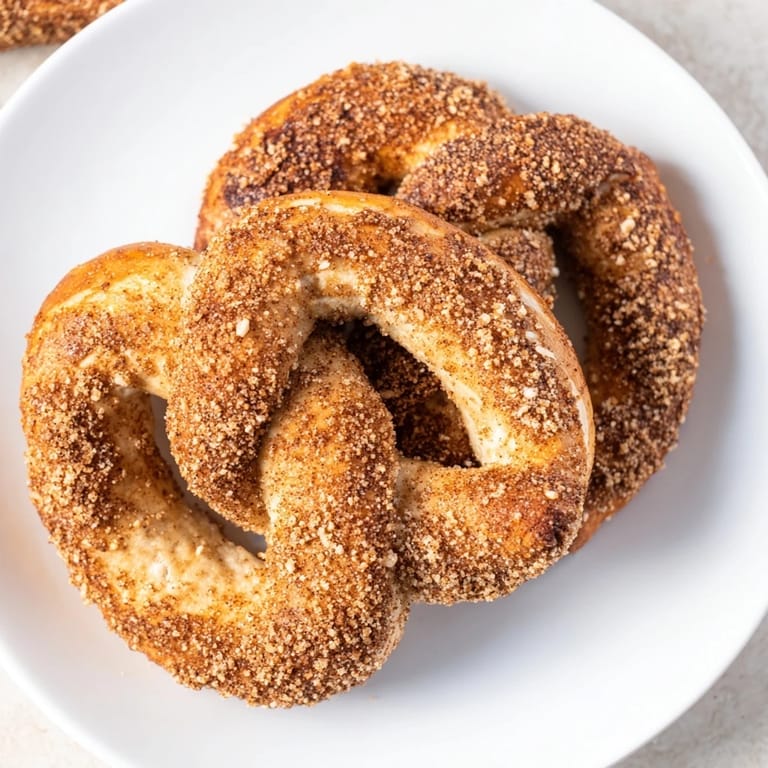
- The final coat:
- While they're still warm, brush each pretzel generously with melted butter. Mix your cinnamon and sugar in a shallow dish and dredge each buttered pretzel until it's fully coated in that fragrant sweetness.
 Save
Save There's something almost sacred about pulling a batch of these from the oven and watching someone take that first bite—the way their eyes close for a second, like they're discovering something they didn't know they were missing. That's the moment that makes every step of the process feel worth it.
The Rise and the Wait
Rising time feels eternal when you're hungry, but those 60 minutes are doing invisible work that can't be rushed. The yeast is feeding on the flour, creating the air pockets that will eventually make these pretzels light and pillowy instead of dense. If you're impatient like I sometimes am, use that time to get everything else ready—measure out your cinnamon sugar, prepare your baking sheets, boil your water. The dough doesn't care if you're watching it.
Why the Boiling Water Bath Changes Everything
The first time I made these without fully understanding this step, I made pretzel-shaped bread that was disappointing and forgettable. Then I learned about the water bath, and something clicked. That baking soda in hot water creates an alkaline environment that transforms the outer layer of the dough, giving it that deep mahogany color and that signature chewy crust that regular bread could never achieve. It sounds like a small thing, but it's actually the entire reason these taste like real pretzels instead of twisted bread wearing a costume.
Timing and Temperature Matter
I've learned through trial and error that rushing any of these steps costs you something irreplaceable. The water needs to actually be hot enough—that baking soda needs boiling water or you lose the effect entirely. The dough needs to rise properly, or you'll end up with dense pretzels that feel like they're punishing you for skipping a step. But once you've made them right once, you understand the rhythm of it, and the recipe stops being instructions and becomes something like a conversation you already know how to have.
- If your water temperature for activating the yeast is off, use a thermometer instead of guessing.
- Don't skip the full rise time—you'll taste the difference and wish you hadn't.
- The oven should be fully preheated, because 450°F is what these pretzels need to achieve that golden exterior.
 Save
Save These pretzels are meant to be eaten warm, preferably with someone you like, while you're still thinking about how you made them from scratch. That's when they taste like exactly what they are—a small act of care that transformed flour and water into something memorable.
Recipe FAQs
- → What makes the pretzels soft and fluffy?
Activating yeast in warm water creates a light dough, while kneading develops gluten for elasticity. Letting the dough rise allows air bubbles to form, resulting in soft, pillowy pretzels.
- → Why is the baking soda water bath important?
Dipping pretzels in boiling baking soda water helps develop the signature chewy crust and golden color by altering the dough's surface before baking.
- → Can I substitute ingredients for dietary needs?
Yes, using whole wheat flour offers a healthier twist. However, note it may affect texture. Butter can be replaced with plant-based alternatives for dietary preferences.
- → How do I achieve an even cinnamon sugar coating?
Brush warm pretzels with melted butter first to act as a sticky base, then dredge evenly in a cinnamon sugar mixture to ensure full coverage and flavor.
- → What are good accompaniments for these pretzels?
Serve with cream cheese dip, warm chocolate sauce, or a drizzle of vanilla glaze to complement the cinnamon sugar sweetness.