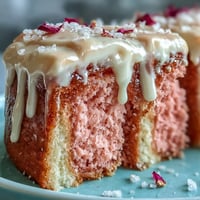
 Save
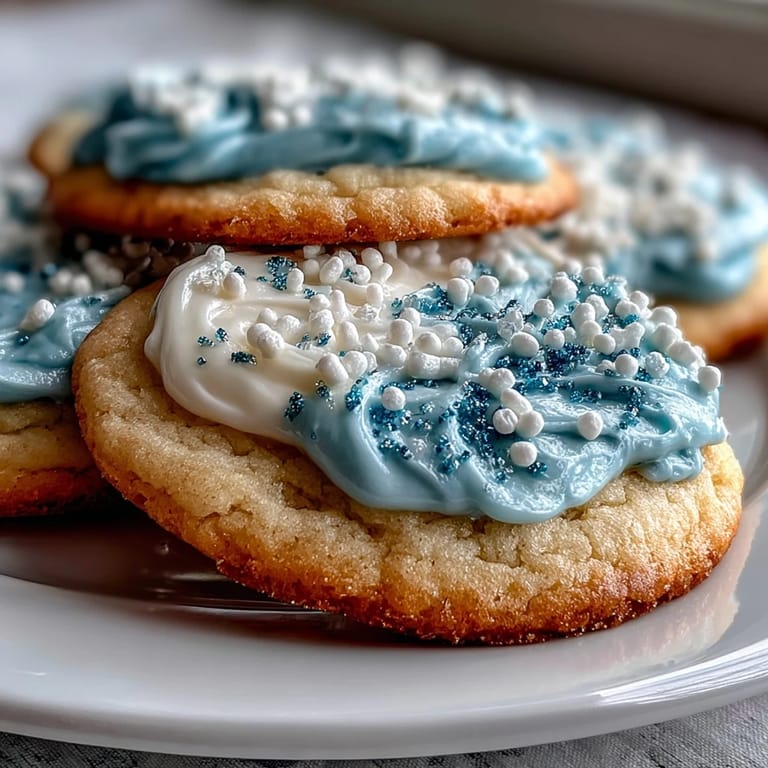
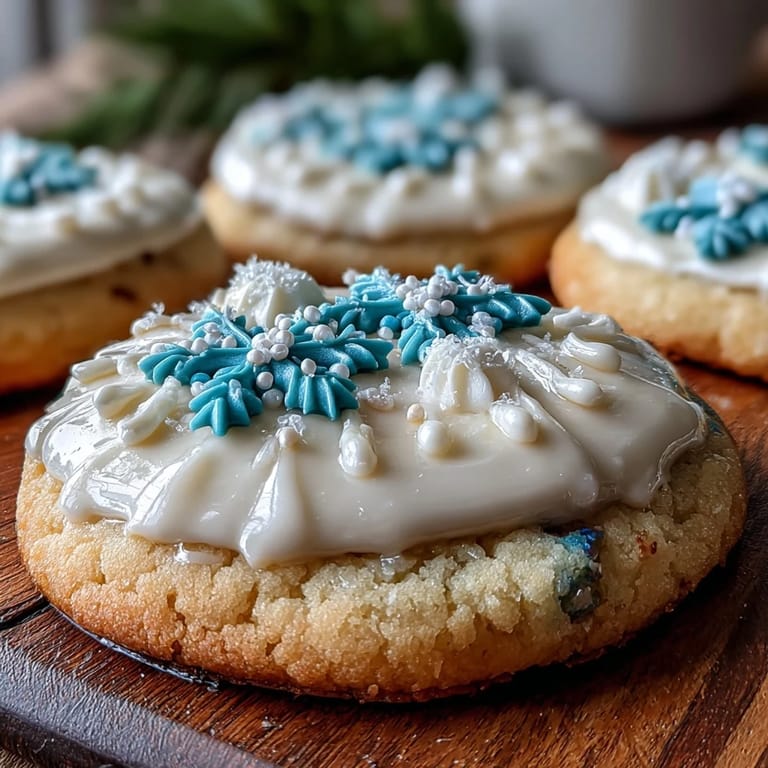
Save My kitchen smelled like vanilla and butter the afternoon my niece showed me her Cookie Run Kingdom obsession, pointing at Pure Vanilla Cookie with such reverence I couldn't help but laugh. She wanted cookies that looked like the character, and I realized I had the perfect excuse to dust off my royal icing piping bags and actually decorate something beautiful. These sugar cookies became our project that weekend, and watching her carefully paint them with blue and gold icing felt like we were creating edible art together. What started as a casual request turned into the kind of kitchen memory that sticks with you, where the mess and the learning and the finished product all mattered equally.
There's a particular joy in making these when you know someone will recognize them, even if just in spirit. I brought a batch to a game night where nobody had heard of Cookie Run Kingdom, but they didn't need to—the cookies did the talking, glossy and golden under the kitchen lights, almost too pretty to eat. My friend Sarah kept saying she was nervous to mess up the appearance, but then she took a bite and her whole face changed. That's when I knew these weren't just about theme or Instagram worthiness; they were genuinely delicious, and that made all the difference.
Ingredients
- All-purpose flour (2 1/2 cups): The backbone of your dough, so measure it by spooning into the cup rather than scooping straight from the bag—this prevents packing too much in and keeps your cookies tender.
- Unsalted butter (3/4 cup), softened: This is non-negotiable; cold butter won't cream properly with sugar, so let it sit on the counter for 20 minutes before you start.
- Granulated sugar (1 cup): The creaming step relies on this to create tiny air pockets, which gives your cookies their delicate crumb.
- Pure vanilla extract (2 tsp): Use the real stuff, not imitation—the flavor difference is noticeable and worth it.
- Baking powder (1/2 tsp) and salt (1/4 tsp): These seem small but they're absolutely essential; they help the cookies spread evenly and enhance the vanilla flavor.
- Egg (1 large) and milk (1 tbsp): These bind everything and add moisture without making the dough sticky, a balance I learned through trial and error.
- Powdered sugar (2 cups, sifted): Sifting removes lumps that would show up as gritty specks in your royal icing.
- Meringue powder (2 tbsp): This stabilizes the icing and lets it set hard and glossy; don't skip it thinking egg whites are the same, because they're not.
- Gel food coloring: Gel doesn't add extra moisture like liquid coloring does, so your icing stays the perfect consistency.
Tired of Takeout? 🥡
Get 10 meals you can make faster than delivery arrives. Seriously.
One email. No spam. Unsubscribe anytime.
Instructions
- Prep your dry ingredients:
- Whisk the flour, baking powder, and salt together in a medium bowl until they're evenly distributed. This step matters more than it sounds because it ensures your leavening is consistent throughout the dough.
- Cream butter and sugar:
- Beat the softened butter and granulated sugar together for 2 to 3 minutes until the mixture looks pale, fluffy, and slightly grainy. You'll know it's ready when you can see light peaks forming as you lift the beaters.
- Add wet ingredients:
- Crack in the egg, pour in the vanilla extract and milk, and mix until everything is just combined. This shouldn't take long; you're not trying to whip air into this mixture anymore.
- Bring dough together:
- Gradually add your dry ingredients to the wet mixture, stirring by hand or on low speed until the dough just comes together. Overmixing at this point develops gluten, which makes cookies tough instead of tender.
- Chill the dough:
- Divide the dough in half, flatten each portion into a disk, wrap tightly in plastic wrap, and refrigerate for at least 1 hour. This prevents excessive spreading in the oven and makes the dough easier to roll out.
- Prepare your workspace:
- Preheat the oven to 350°F (175°C) and line your baking sheets with parchment paper. Having everything ready means you can work quickly once you start rolling.
- Roll and cut:
- On a lightly floured surface, roll out one portion of dough to about 1/4-inch thickness and cut into shapes with cookie cutters. If the dough gets too warm and sticky, pop it back in the fridge for 10 minutes.
- Space and bake:
- Transfer cookies to the prepared baking sheets, leaving about 1 inch between each one, and bake for 10 to 12 minutes until the edges just barely start to turn golden. The centers should still look slightly underbaked because they continue cooking as they cool.
- Cool properly:
- Leave cookies on the baking sheet for 5 minutes to firm up, then transfer them to a wire rack to cool completely. This step is crucial for your royal icing base to set smoothly.
- Mix royal icing:
- Combine sifted powdered sugar, meringue powder, vanilla extract, and 4 tablespoons of warm water in a large bowl. Beat on low speed until the mixture is smooth and glossy, adding more water one teaspoon at a time until you reach spreadable consistency.
- Color and decorate:
- Divide your icing into bowls and tint with gel food coloring to match your Pure Vanilla Cookie theme (blues, whites, and golds work beautifully). Using piping bags or squeeze bottles, decorate your fully cooled cookies with whatever design speaks to you, then let the icing cure completely before stacking or storing.
 Save
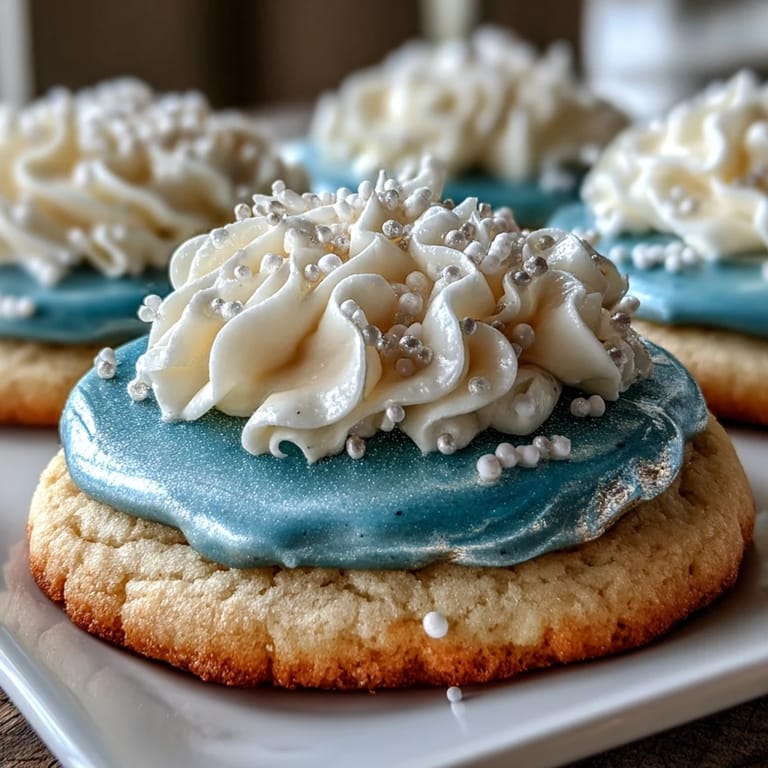
Save There was a moment, about halfway through my niece's decorating session, when she stopped and just looked at her cookie. She'd piped tiny details on the edges, blended two shades of blue together, and added little gold accents that somehow actually worked. She didn't say anything, just smiled at it like she'd created something that mattered, and I realized that's what these cookies do—they give people permission to try something small that feels a little fancy, a little creative, a little outside their usual routine.
The Perfect Thickness
Rolling dough to exactly 1/4-inch takes practice and patience, but once you nail it, everything else falls into place. I learned to use a ruler propped nearby and to check thickness in a few spots rather than assuming, because thick cookies bake differently than thin ones, and consistency is how you avoid half-golden, half-pale baking sheets. A bench scraper also becomes your best friend here for scraping up dough that sticks and for transferring delicate shapes without tearing.
Icing Consistency is Everything
The moment I stopped guessing about icing thickness and started thinking about what I actually wanted it to do, these cookies got better. For piping details and fine lines, you want icing that's thick enough to hold shape but fluid enough to flow from the piping bag without constant pressure. For flooding large areas, you'd thin it slightly more so it settles smoothly into an even gloss without air bubbles. The water additions should be genuinely gradual because once you add too much, you're starting the whole batch over with more sugar.
Storage and Staying Power
One of my favorite things about royal icing is that it actually hardens, which means these cookies can be stacked, boxed, and shipped without anything smudging or sticking together. I've kept a sealed container in my kitchen for over a week and they stayed crisp and beautiful, probably because the icing seals in the cookie. If you're making these for gifting, let the icing set for at least a few hours before packaging, and store everything at room temperature away from humidity.
- Make sure your cookies are completely cool before icing, or the icing will melt and look dull instead of glossy.
- Gel food coloring is worth seeking out because it won't thin your icing the way liquid coloring does.
- If your icing is still piping but feels slightly softer than ideal, let it rest for a few minutes and it'll firm up on its own.
 Save
Save These cookies remind me that sometimes the best reason to cook is simply because someone you care about will light up when they see the result. Whether you're making them for a themed party, a gift, or just because you want your kitchen to smell like vanilla on a random Tuesday, they're worth the effort.
Recipe FAQs
- → How do I achieve the perfect cookie texture?
Chilling the dough for at least an hour helps the cookies maintain their shape and ensures an even bake with a tender yet crisp texture.
- → What is royal icing made of?
Royal icing combines powdered sugar, meringue powder, vanilla extract, and water, whipped until smooth and glossy for decorating baked goods.
- → Can I customize the icing colors?
Yes, gel food coloring can be added to the royal icing to create vibrant blue, yellow, white, or other shades for themed decoration.
- → How should I store the decorated cookies?
Store fully dried cookies in an airtight container at room temperature for up to one week to maintain freshness and texture.
- → What tools are recommended for decorating?
Use piping bags or squeeze bottles for precise royal icing application, along with cookie cutters and a wire rack for best results.